WattleDB guide
How to set up a PostgreSQL 17 database in the WattleDB console, connect to it, and use what comes with it. Screenshots are from a test workspace, October 2026.
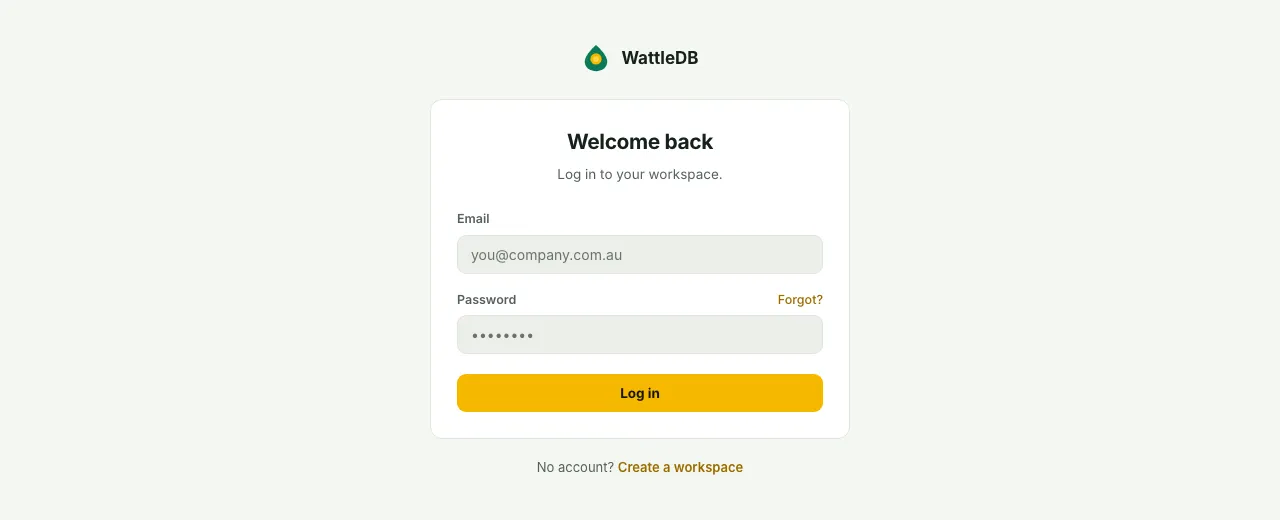
Sign in
You do everything from the console. The Free plan doesn't need payment details.
- Open console.wattledb.com.au. You'll see Create your workspace.
- Fill in Work email, Organisation name and Password (8 characters or more).
- Click Create workspace.
- Click the link in the verification email.
- Back in the console, click I’ve verified.
Already have an account? Enter your email and password and click Log in. With two-factor on, you'll also need a code from your authenticator app.
Create a database
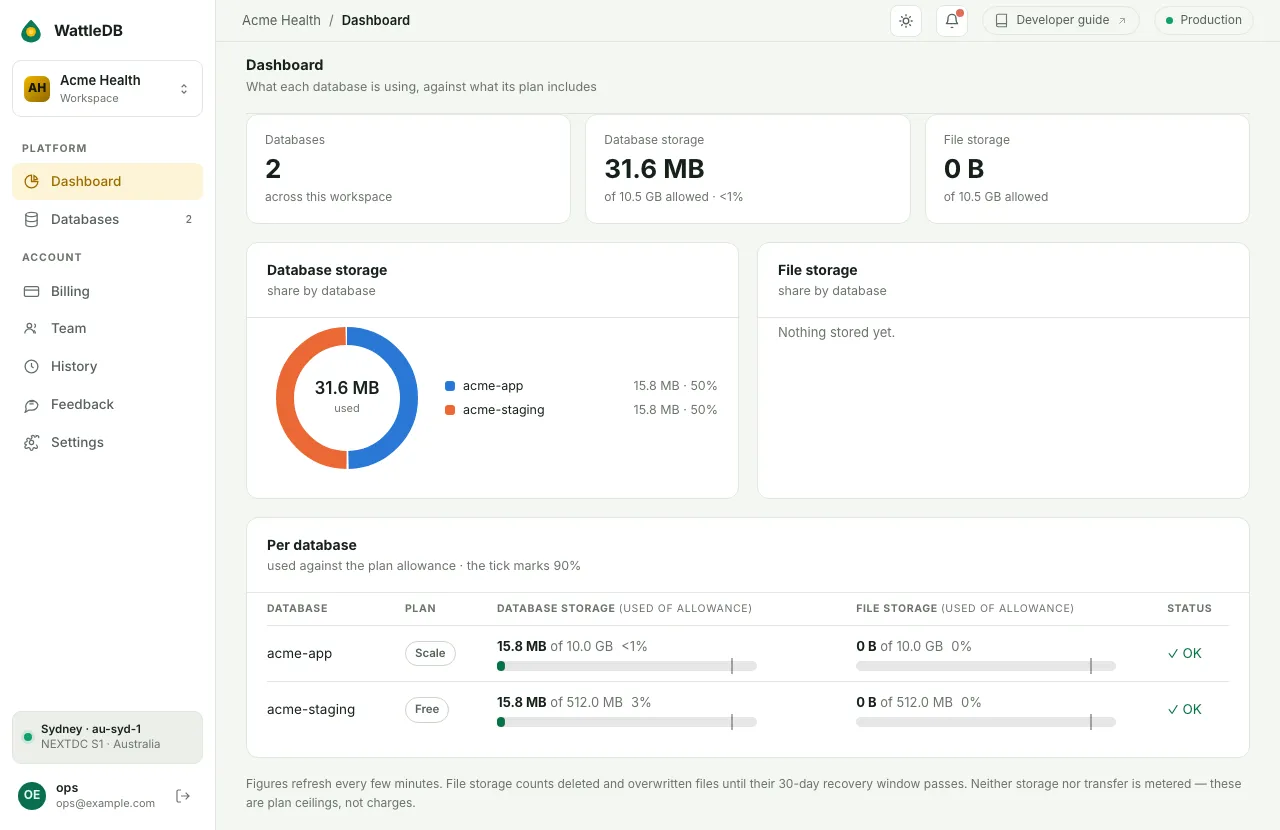
Each database is a separate PostgreSQL instance in Sydney with its own plan.
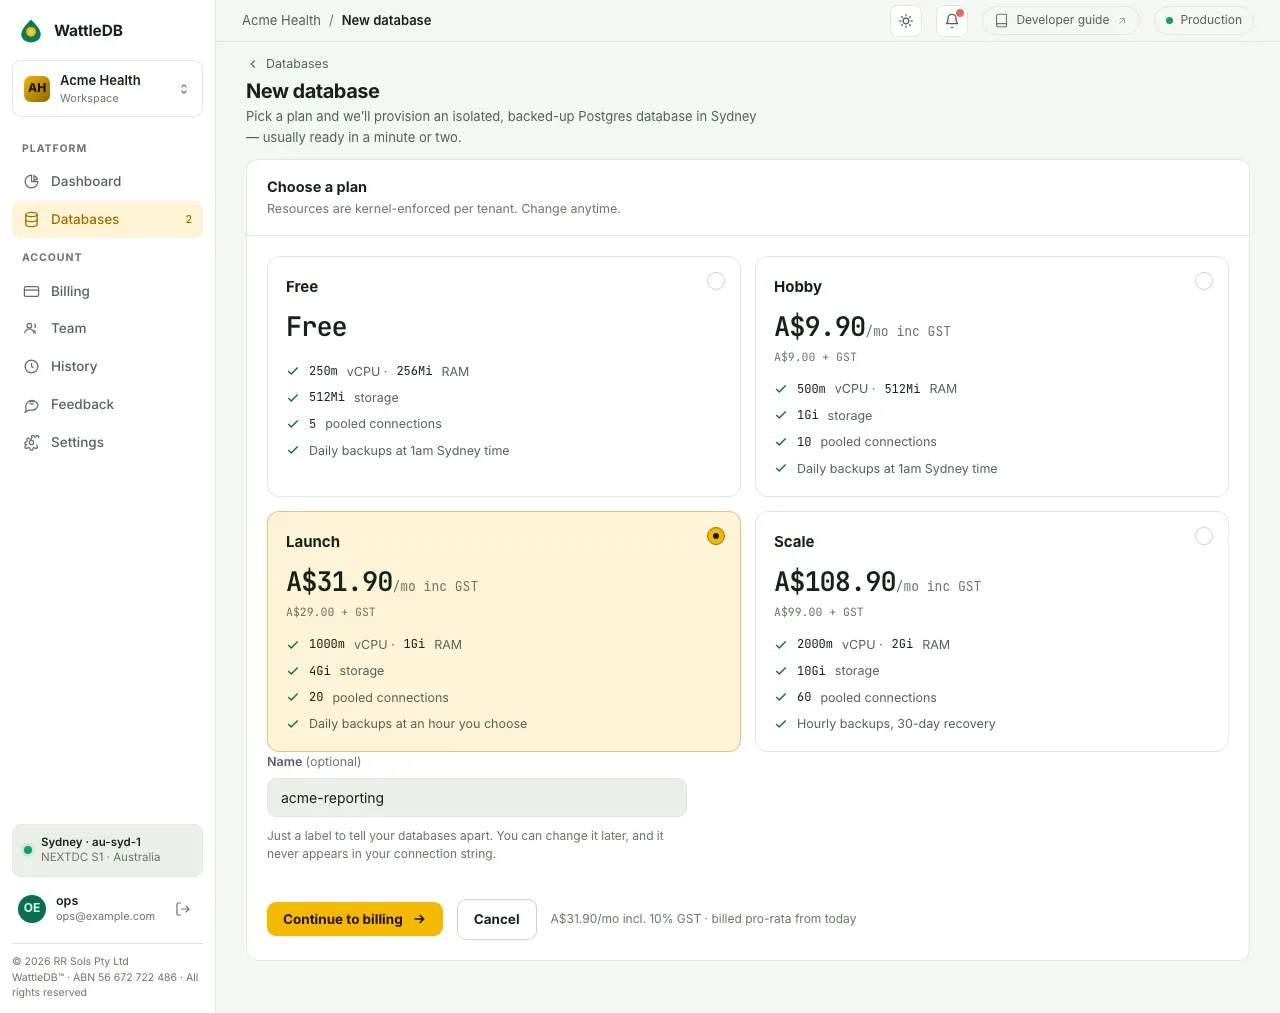
- In the sidebar, click Databases, then New database.
- Click a plan card. The plan table below has the same figures.
- Type a Name if you like. It's only a label.
- Free plan: click Create Free database.
- Paid plan: click Continue to billing, check your billing details, then click Purchase & provision.
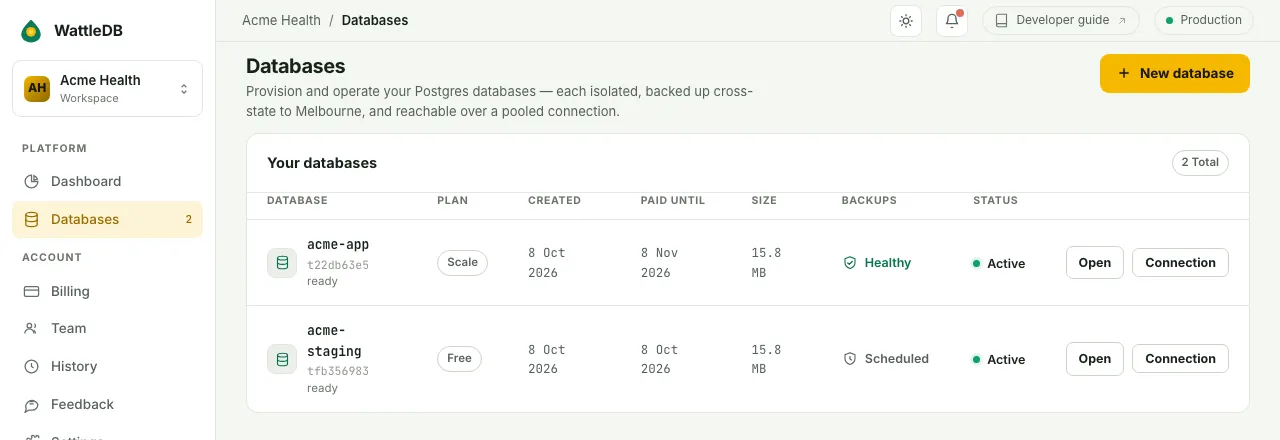
A new row on Databases. When its status reads Active (usually after a minute or two), it's ready.
- You can have one Free database per workspace.
- For a paid database we email a GST tax invoice, payable within 7 days by bank transfer or PayID. Nothing is charged automatically. Invoices are under Billing.
Connect to it
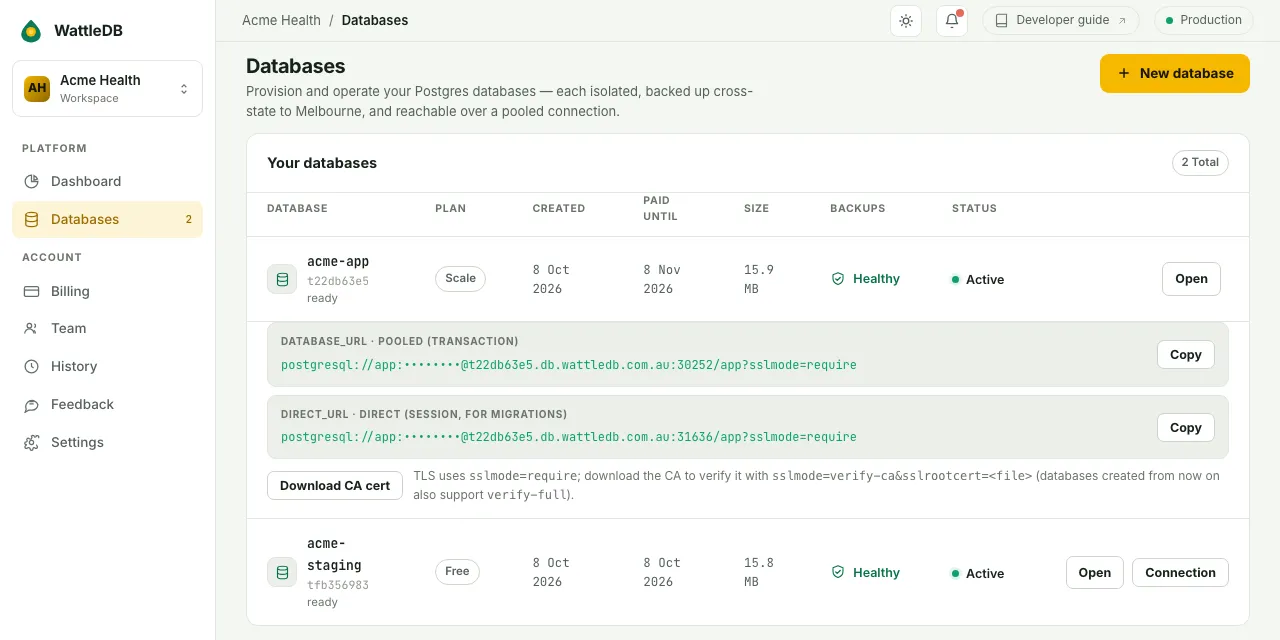
Every database has two connection strings: pooled for your app, direct for migrations, psql and pg_dump.
- On Databases, click Connection on the database's row.
- Copy DATABASE_URL · pooled (transaction) into your app's environment.
- Copy DIRECT_URL · direct (session, for migrations) for migrations and
psql.
# DIRECT_URL holds the direct string from the console
psql "$DIRECT_URL" -c 'select version();'
import pg from 'pg';

const pool = new pg.Pool({ connectionString: process.env.DATABASE_URL });
const { rows } = await pool.query('select now() as ts');
console.log(rows[0].ts);
- The pooled string goes through PgBouncer in transaction mode, so session state doesn't stay with you. Use
SET LOCALinside a transaction instead ofSET, and the direct string for advisory locks,LISTENor long-lived prepared statements. - Keep
sslmode=require. To verify the certificate too, click Download CA cert and usesslmode=verify-ca&sslrootcert=<file>. Newer databases also acceptverify-full.
Create tables and run SQL
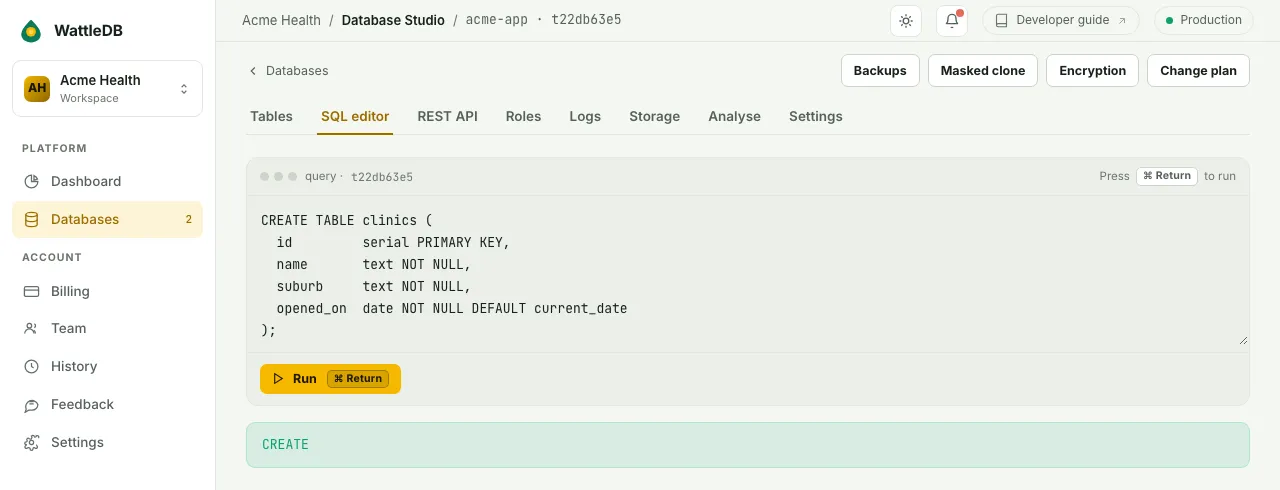
The SQL editor is the quickest way to create your first tables.
- On Databases, click Open on the database's row. This opens its Studio.
- Click the SQL editor tab.
- Paste your SQL and click Run, or press Ctrl + Enter (⌘ Return on a Mac).
create table todo (
  id       bigint generated always as identity primary key,
  owner_id uuid not null,
  title    text not null,
  done     boolean not null default false
);

insert into todo (owner_id, title)
values ('00000000-0000-0000-0000-000000000001', 'Try the REST API');
Running migrations from code (Prisma, Drizzle, Flyway)? Point the tool at DIRECT_URL.
Browse and edit rows
The Tables tab lets you look through data and fix a value without SQL.
- In the Studio, click Tables.
- Pick a table on the left. Filter tables narrows a long list.
- Switch between Data (rows) and Schema (columns). Click a heading to sort, or use Add filter.
- To change a value, double-click the cell, edit it and click Save.
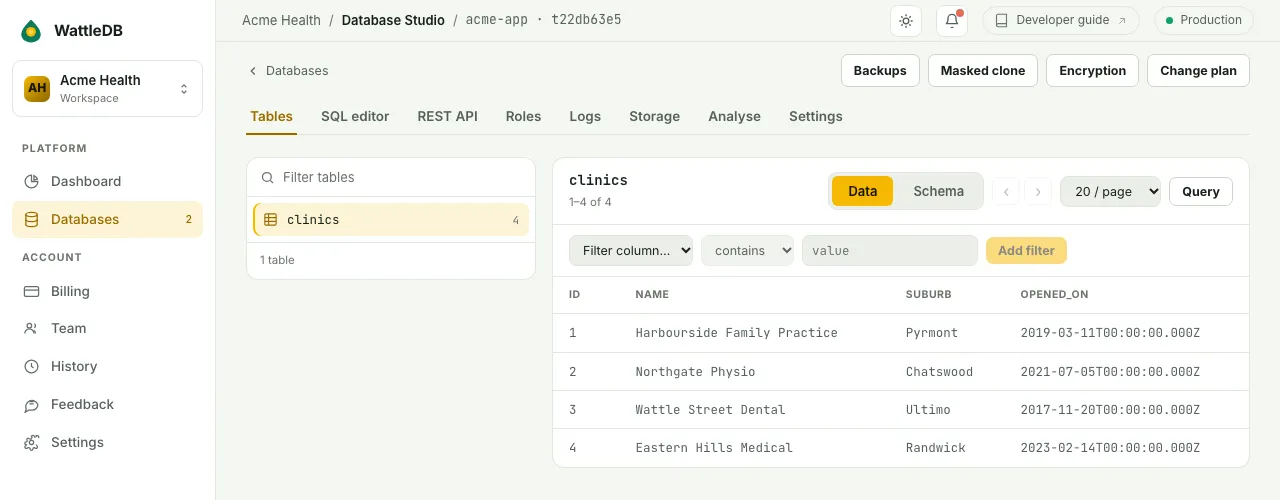
Editing needs a primary key on the table. The console warns you before you change a foreign-key column.
Use the REST API
The REST API gives every table an HTTP endpoint (PostgREST, at https://<id>.api.wattledb.com.au).
- In the Studio, click REST API.
- Click Enable REST API. If it says it's starting, wait and click Refresh.
- Copy the Base URL. Each table under Endpoints takes
GET,POST,PATCHandDELETE. - Under Authentication, click Generate authenticated token and copy the token.
- Call the API with the token:
# read: filter, sort and page with query parameters
curl "https://t1a2b3c4d.api.wattledb.com.au/todo?select=*&order=id.desc&limit=10" \
  -H "Authorization: Bearer $TOKEN"

# insert
curl -X POST "https://t1a2b3c4d.api.wattledb.com.au/todo" \
  -H "Authorization: Bearer $TOKEN" \
  -H "Content-Type: application/json" \
  -d '{"owner_id":"00000000-0000-0000-0000-000000000001","title":"Buy milk"}'
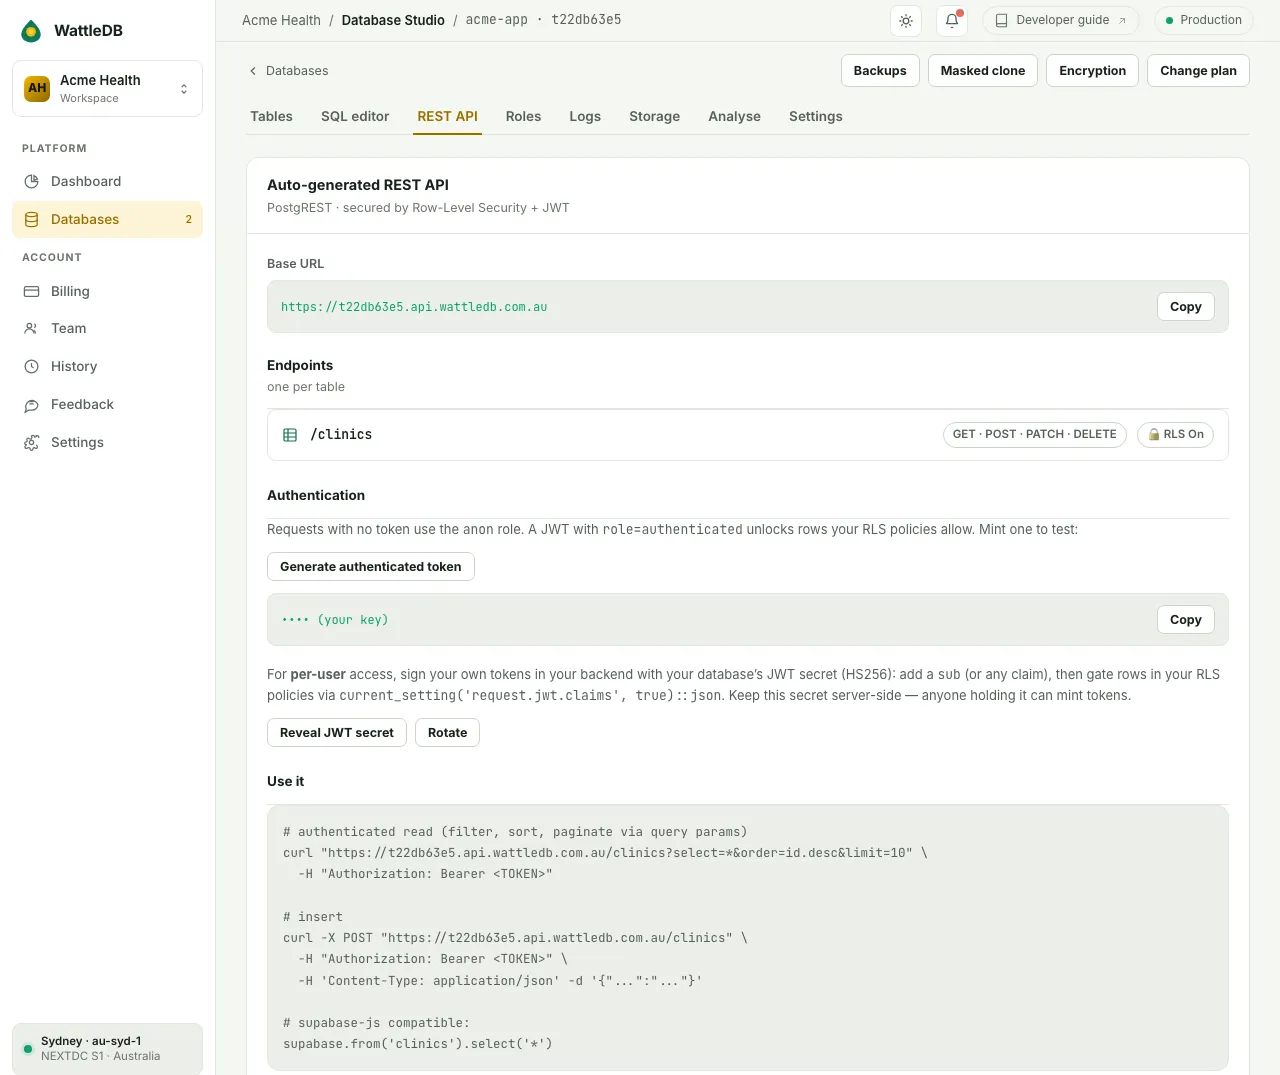
No token means the anon role. The test token is valid for a year, so treat it like a password. Rotate on the JWT secret cancels every existing token. PostgREST clients such as @supabase/postgrest-js work against the Base URL.
Check who can read each table
⚠ public · no token needed: anyone with the URL can read the table. Click Make private in the warning and confirm.⚠ no RLS · all rows: any token for this database reads and writes every row. That's OK for one trusted backend. If each user gets a token, turn on RLS.🔒 RLS On: callers see only what your policies allow.
Turning on the API used to let the anon role read every table. We stopped on 20 July 2026 but didn't take it back from databases that already had it. That's the public · no token needed badge. Make private removes it, and anything reading your data without a token will stop working, so check first.
Give each user only their own rows (RLS)
- Click Secure (RLS) next to the table. This turns on Row-Level Security with one allow-everything policy,
authenticated_all. - In the SQL editor, add your own policy and drop
authenticated_all. Policies are OR'd, so if you leave it your policy changes nothing.
-- sub is the user id in the token; cast it to your column's type
create policy own_rows on public.todo for all to authenticated
  using (owner_id = (current_setting('request.jwt.claims', true)::json->>'sub')::uuid);

drop policy authenticated_all on public.todo;
- Click Reveal JWT secret and keep it on your server. Anyone with it can make tokens.
- Sign a token for each user in your backend:
import jwt from 'jsonwebtoken';

const token = jwt.sign(
  { role: 'authenticated', sub: user.id },
  process.env.WATTLEDB_JWT_SECRET,
  { algorithm: 'HS256', expiresIn: '1h' },
);
The badge reads 🔒 RLS On, and each user's token returns only their rows. The console's test token has no sub, so it now returns nothing.
When Make private isn't enough
Make private only takes back grants we made. If you granted access yourself, the warning names it and gives you the REVOKE to run.
ALTER DEFAULT PRIVILEGESneedsFOR ROLE. Leave it out and the statement succeeds but changes nothing.- Tables created in the console before 25 July 2026 belong to the system user, so
REVOKEorDROP POLICYon them fails withpermission denied. Email support@wattledb.com.au a screenshot of the REST API tab and we'll do it.
Roles and passwords
Every database starts with one login, app, which owns it. Use app for migrations and give everything else its own login.
- In the Studio, click Roles.
- Under Add a role, type a name (for example
reporting_ro) and choose an access level. - Click Create role.
- Copy the password now. It's shown once and we don't keep it.
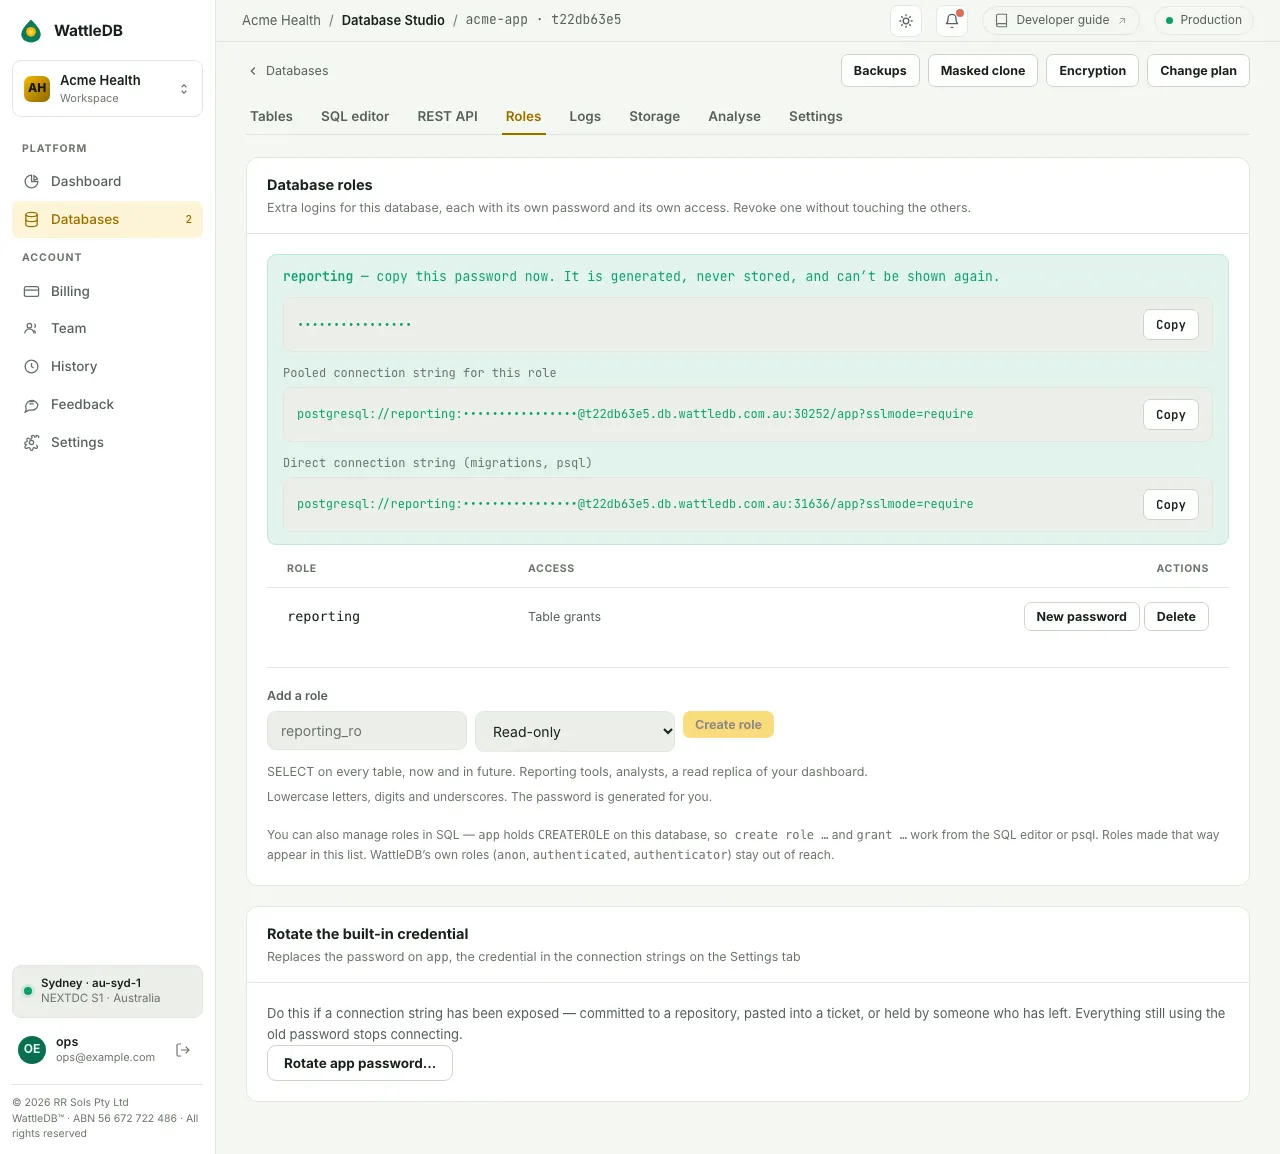
| Access level | Can do | Use it for |
|---|---|---|
| Read-only | SELECT on every table, including tables made later | Reporting and BI tools |
| Read & write | SELECT, INSERT, UPDATE, DELETE; no schema changes | An app that doesn't run migrations |
| Owner (migrations) | What app can do, including create, alter and drop | Migration jobs only |
| Connect only | Log in and nothing else | When you want to write the GRANTs yourself |
You can also manage roles in SQL. app holds CREATEROLE, and roles you create this way show up on the Roles tab.
create role reporting_ro login password 'use-a-long-random-password';
grant connect on database app to reporting_ro;
grant usage on schema public to reporting_ro;
grant select on all tables in schema public to reporting_ro;

-- tables app creates later; FOR ROLE app is required
alter default privileges for role app in schema public
  grant select on tables to reporting_ro;
You can't create a superuser, grant BYPASSRLS, or change the REST API's roles (anon, authenticated, authenticator).
If a password leaks
- On the Roles tab, under Rotate the built-in credential, click Rotate app password…
- Click Yes, rotate it.
- Deploy the new
DATABASE_URLandDIRECT_URL. The old password stops working.
For other roles, use New password or Delete on the row. Tables a deleted role created pass to app.
Don't change app's password with alter role. The console won't know, and the strings it shows will be wrong.
Store files
Each database can have a private S3-compatible bucket. Its size depends on the plan, and uploads are refused once it's full.
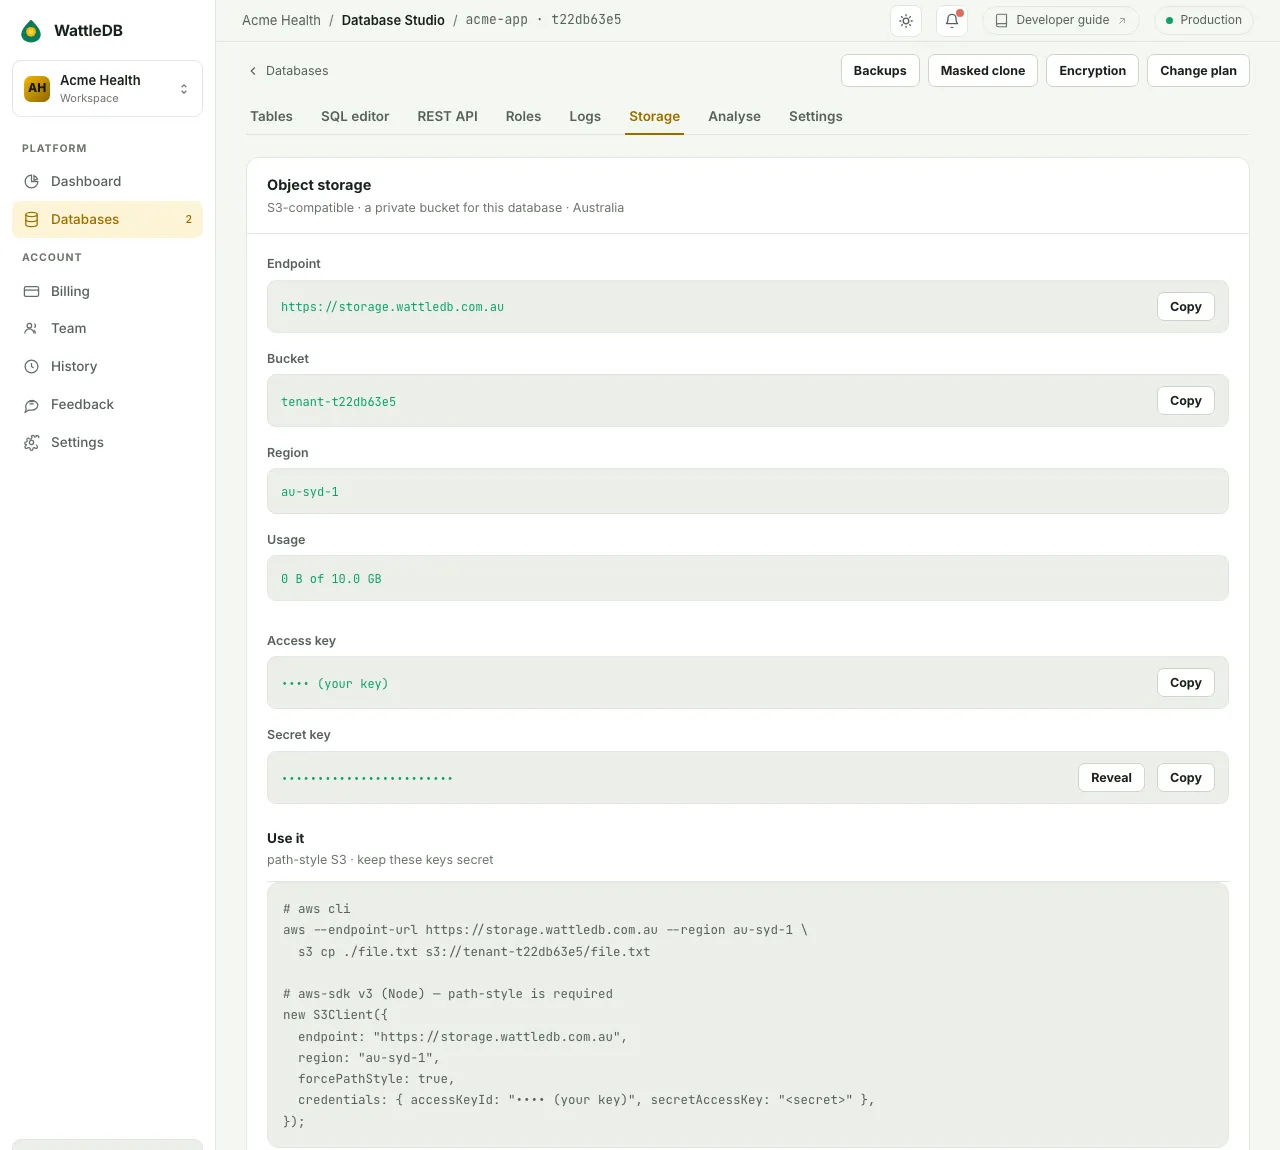
- In the Studio, click Storage. The bucket is set up the first time you open this tab.
- Copy the Endpoint, Bucket, Region and Access key. Click Reveal to see the Secret key.
- Use any S3 client with path-style addressing (
forcePathStyle: truein the AWS SDK):
aws --endpoint-url https://storage.wattledb.com.au --region au-syd-1 \
  s3 cp ./report.pdf s3://tenant-t1a2b3c4d/report.pdf
- Never put the bucket keys in a browser or mobile app. They can delete every file. For browser uploads, make a short-lived presigned URL on your server instead.
- Deleted or overwritten files stay recoverable for 30 days: find the version with
aws s3api list-object-versionsand fetch it withget-object --version-id. Deleting a specific version removes it for good. - Buckets are served from Sydney. Every 6 hours we copy them to Melbourne, and that copy is what we restore from if Sydney is lost. It isn't an endpoint you can reach, and a delete reaches it at the next copy, so it won't bring back a file you deleted. Object storage isn't covered by the SLA. Keep your own copy of anything you can't re-create, and keep records you must retain in PostgreSQL.
Backups and restore
Backups run on their own: daily at 1am Sydney time (Free, Hobby), at an hour you choose (Launch), or hourly (Scale), with changes archived in between. They're stored in Melbourne. You can restore to any moment in the last 7 days, or 30 on Scale. A restore makes a new database and leaves the original alone.
- On Databases, click the entry in the Backups column (for example Healthy), or Backups in the Studio.
- Click Restore… next to the database.
- Under Restore point, pick Latest, a listed backup, or Specific time… (Sydney time, to the second).
- Check the plan. It's the original's plan; a Free database restores onto a paid plan you choose.
- Tick the box to say you understand it's a new, separately billed database, then click Confirm & create restored database.
- When it's active, check the data, point your app at it, and delete the database you don't need.
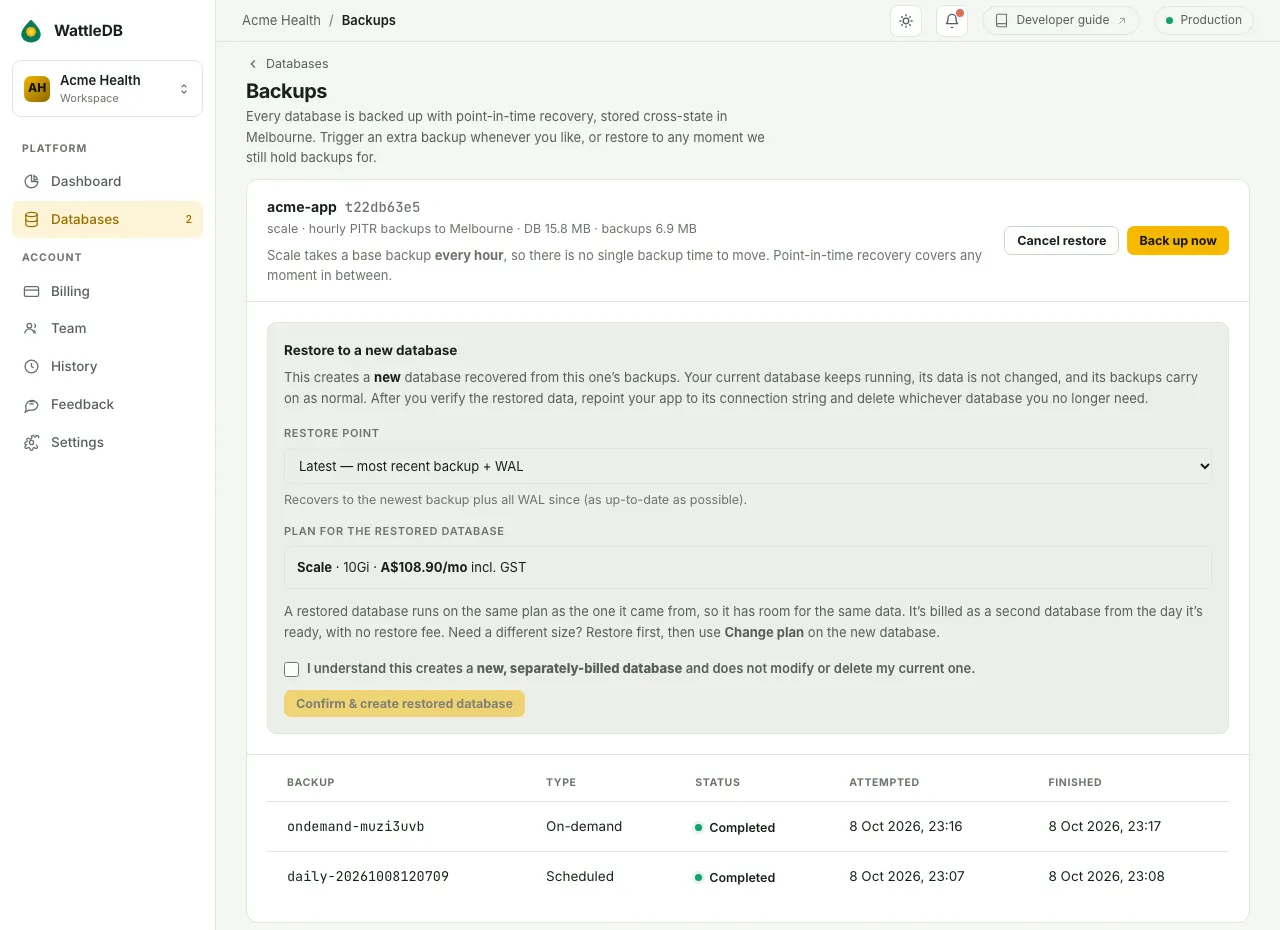
A new row on Databases, billed as a normal database from the day it's ready. There's no restore fee.
- You need at least one completed backup. On a brand-new database, click Back up now and wait for it to finish.
- A time in the last few minutes may be too recent. Pick Latest instead.
- On Launch, set the backup hour with Backup time on this page.
Masked clones
A masked clone copies a Scale database into a new one and replaces common personal fields with fake values, for staging and testing. Masked clones aren't charged at the moment.
- Open the Scale database's Studio and click Masked clone.
- Under Target & duration, pick a plan for the clone and an Expires on date. It must be at least 7 days away (AEST).
- Click Create clone.
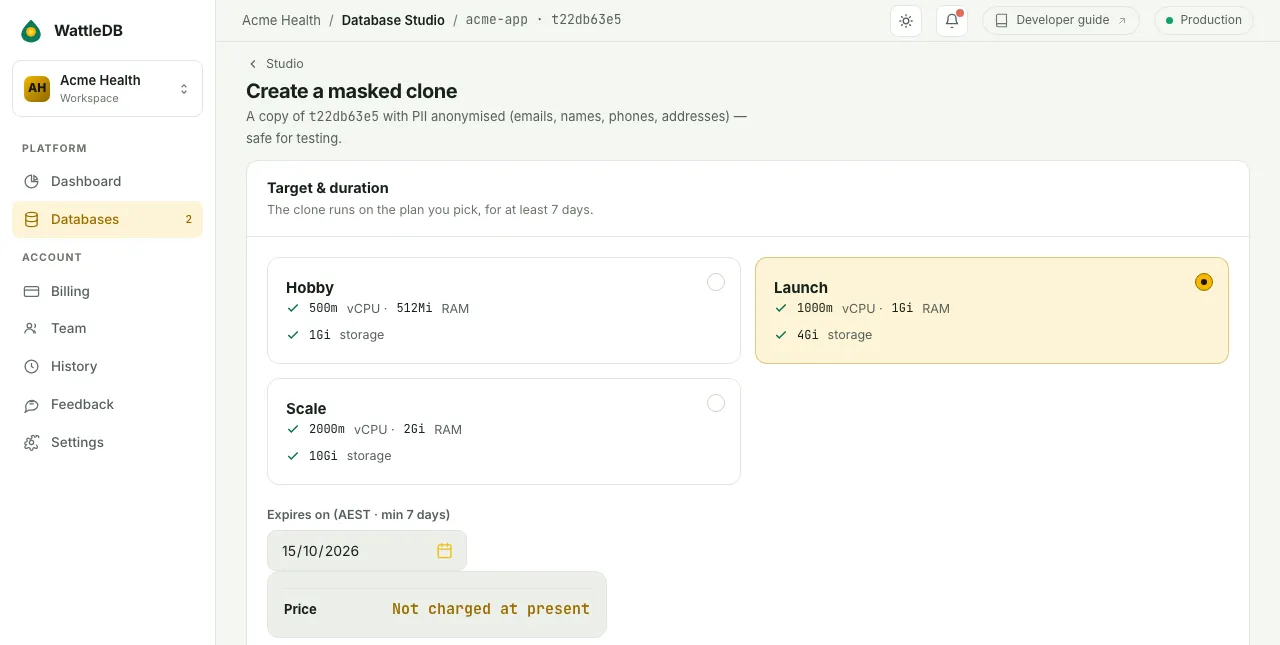
A new row on Databases marked cloning. When it's done, Open appears. To keep it longer, click Extend on its row and pick a new date.
- Columns are matched by name (emails, phones, addresses, postcodes, dates of birth,
*_name). Medicare, TFN or member numbers, free-text notes, camelCase names and personal data in numeric orjsonbcolumns aren't masked. The FAQ has the full rules. Check the clone against your schema. - Deleting a clone early can't be undone. You can always extend it instead.
Change plan
Changing plan resizes the same database. The connection string doesn't change. Only the workspace owner can do it.
- In the Studio, click Change plan.
- Click the plan you want.
- Read the cost. An upgrade credits your unused days, charges them at the new rate, and adds the difference to your next invoice.
- Click Pay A$… and switch (or Switch to the plan when there's nothing to pay).
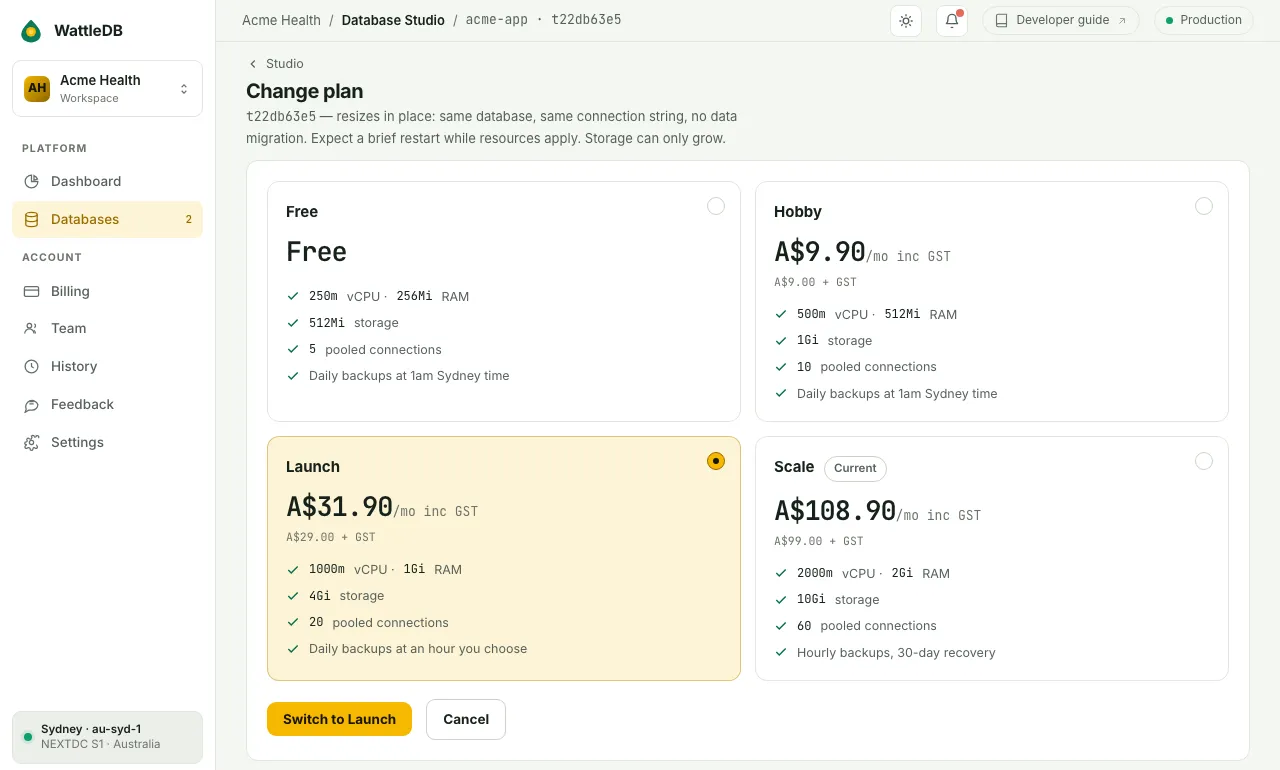
A brief restart while the new limits apply.
- You can move down only if your data fits (under 80% of the smaller plan's storage, with your files inside its bucket) and your team still fits the seats of the largest plan left in the workspace. A database's plan can change once per billing period.
- Move to a cheaper plan within 7 days of paying and we refund the difference for that month (Refund Policy).
Logs
Check the logs when a request fails or a connection is refused.
- In the Studio, click Logs.
- Choose REST API (each request's method, path and status) or Database (connections, errors and notices from PostgreSQL).
- Use Filter, Refresh or Download as needed.
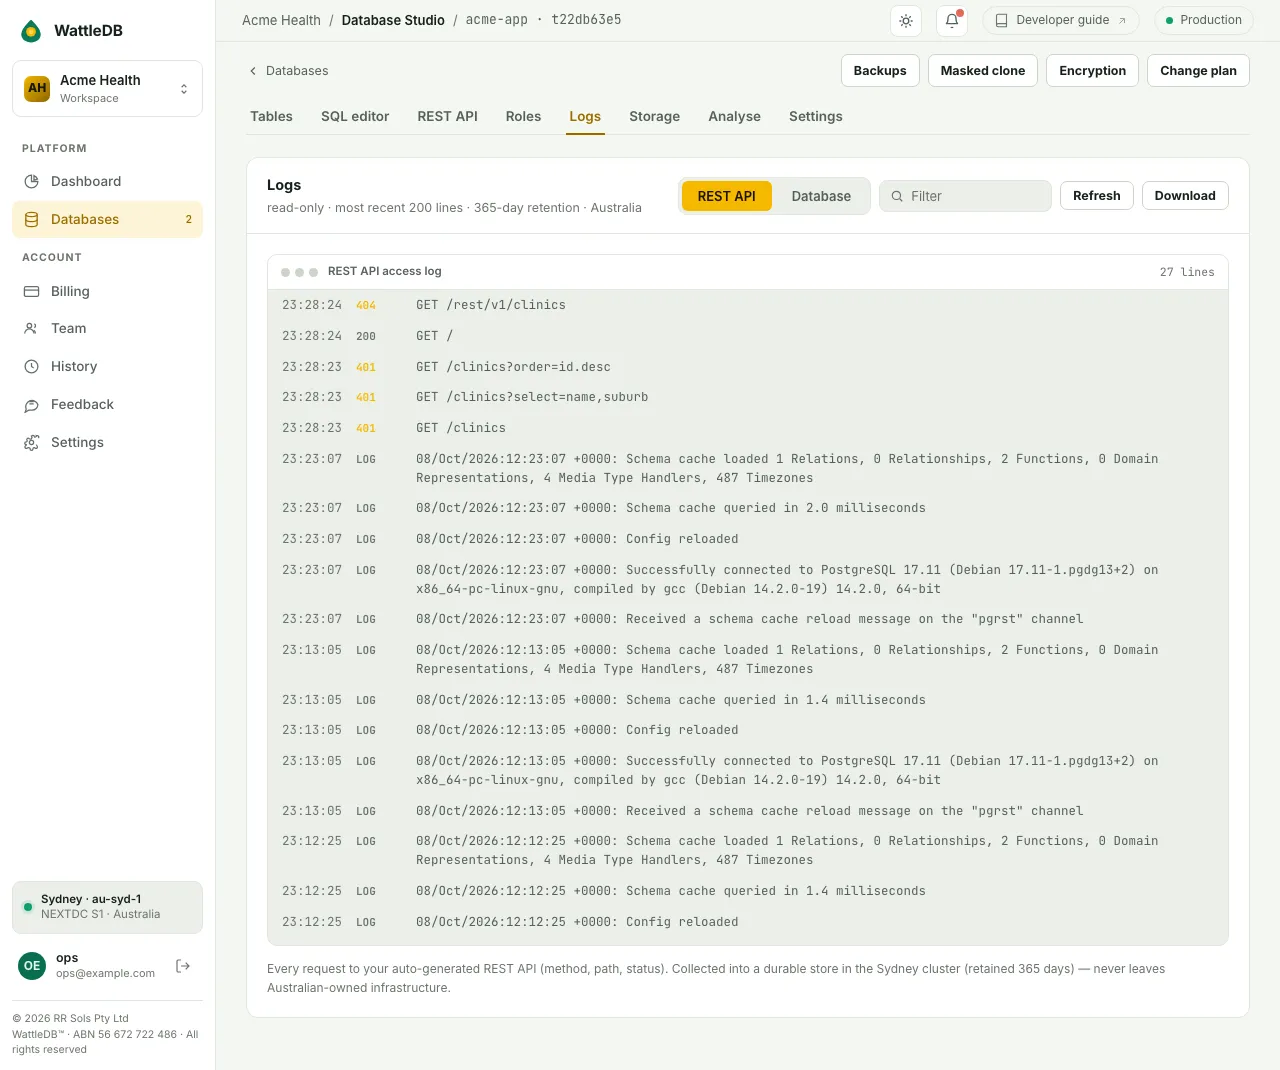
The tab shows the latest 200 lines. Logs are kept for 365 days and stay in Australia.
History
History records what happened in your workspace and to your account: databases, plan changes, invoices and sign-ins. The newest event is first.
- In the sidebar, under Account, click History.
- To go further back, go to the last page and click Load older events.
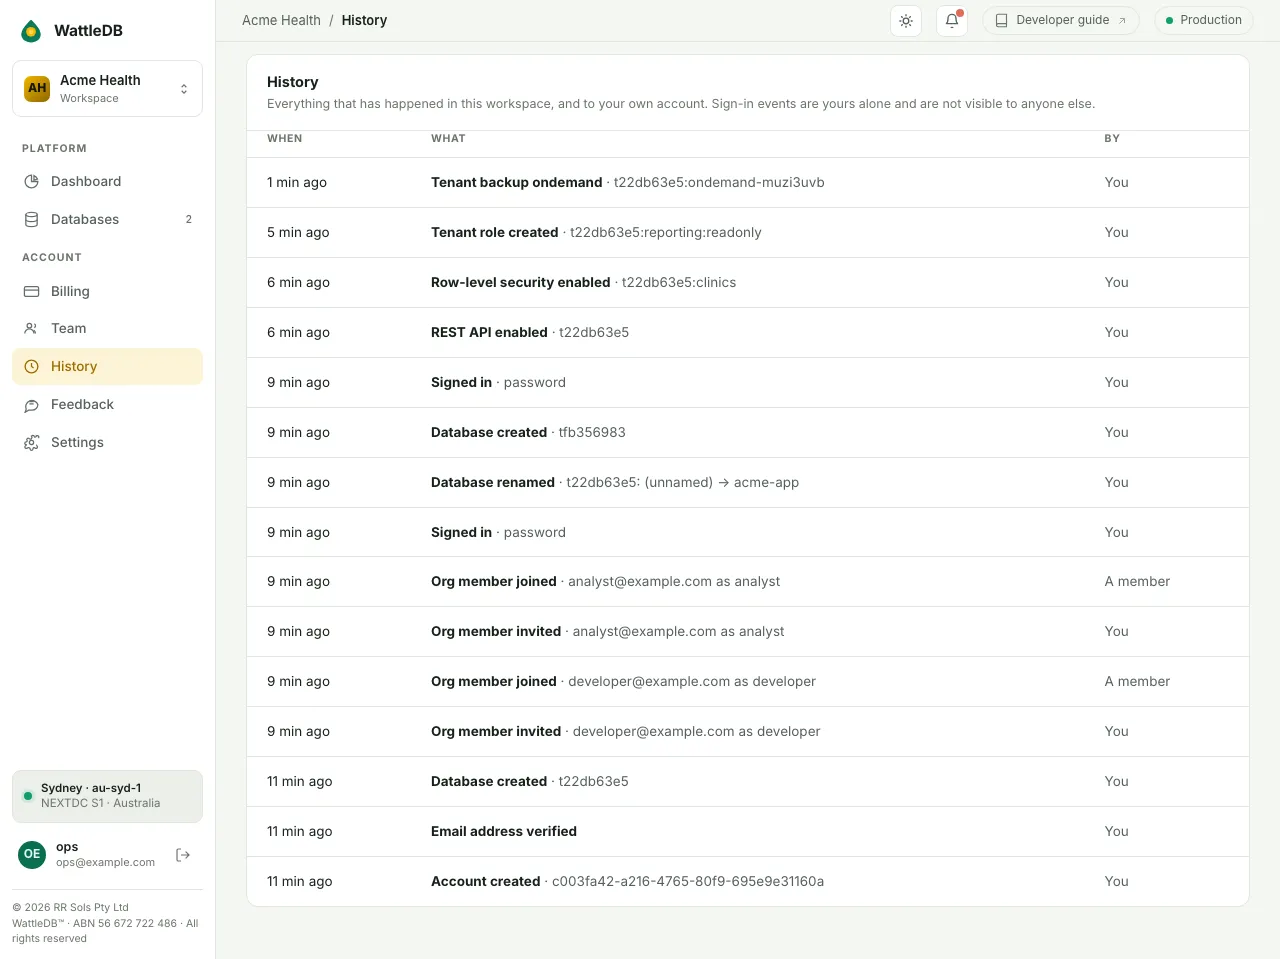
Read the By column closely:
- You: something you did.
- A member: someone else in your workspace.
- Support: someone at WattleDB acting on your account. If you didn't ask for it, email support@wattledb.com.au.
- Platform: the system on its own, such as cleaning up after a deleted database.
- Your sign-ins are shown only to you.
- Sign-in and database events are kept for 12 months, billing records for 7 years, other entries for 6 months. We record no IP address or location (see the Privacy Policy).
Notifications
Planned maintenance and platform changes go to the bell in the console's top bar. A dot means something unread.
During a deployment you may see The console is briefly unavailable. Your database connections, REST API and file storage don't go through the console and keep working.
Team
You can share a workspace once it has a Launch database (5 people) or a Scale database (20 people), counting the owner and unaccepted invitations. Free and Hobby are for one person.
- In the sidebar, click Team.
- Under Invite someone, enter their Email address and choose a Role.
- Click Send invitation. The link lasts 7 days and only works for that address.
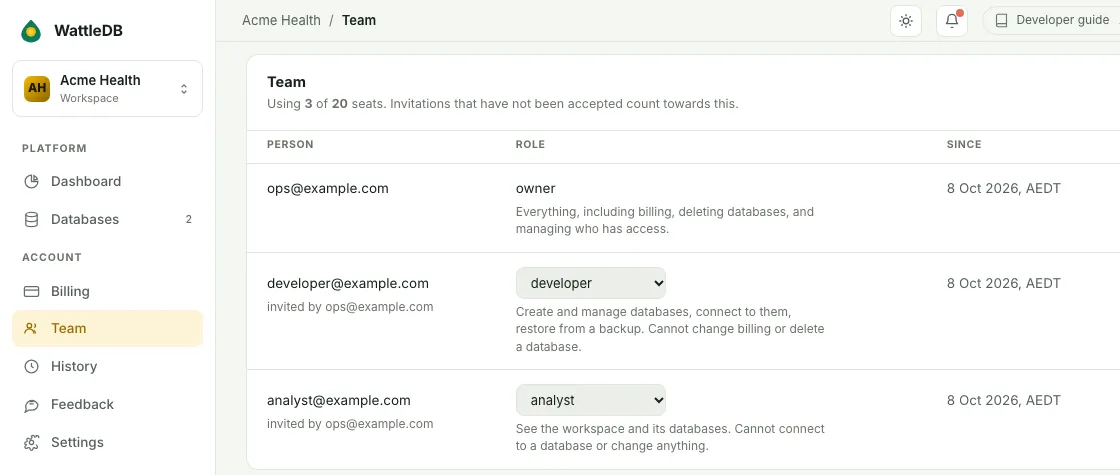
- Owner: everything, including billing, deleting databases and managing access.
- Developer: create and manage databases, connect, restore from a backup. Can't change billing or delete a database.
- Analyst: see the workspace and its databases. Can't connect or change anything.
Each Developer gets their own database login, removed when they leave or become an Analyst.
- Only the owner can pay, so only they can clear an unpaid invoice.
- There's no button to transfer ownership. Email support@wattledb.com.au and we'll move it.
- Removing someone signs them out of every WattleDB workspace, including their own. They can sign back in to the rest.
Account security
Your console login controls your databases. Turn on two-factor.
- In the sidebar, click Settings.
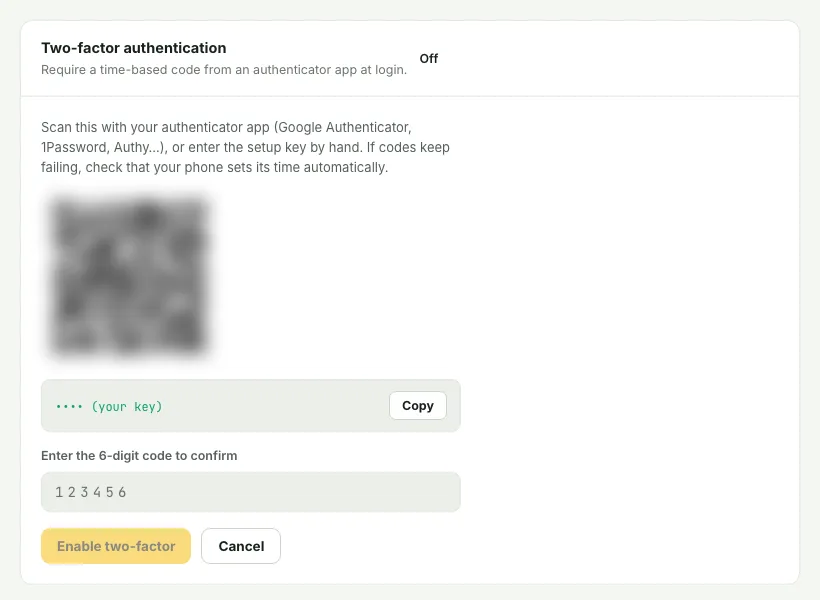
- Under Two-factor authentication, click Enable two-factor.
- Enter your password.
- Scan the QR code with an authenticator app.
- Enter the 6-digit code from the app and click Enable two-factor.
- Save the recovery codes (each works once), tick the box to say you have, and click Done.
Enabled. Your other devices are signed out and will ask for a code.
Settings also has Change password, which signs out other devices, and Log out of all devices for a lost laptop or phone.
Plans
Per database, per month, in Australian dollars. The first price includes GST. Details on Pricing.
| Plan | Price / mo | CPU | RAM | Database | Files | Pooled conns | Backups | People |
|---|---|---|---|---|---|---|---|---|
| Free | A$0 | 0.25 | 256 MB | 512 MB | 512 MB | 5 | Daily, 7 days | 1 |
| Hobby | A$9.90 A$9 + GST | 0.5 | 512 MB | 1 GB | 2 GB | 10 | Daily, 7 days | 1 |
| Launch | A$31.90 A$29 + GST | 1 | 1 GB | 4 GB | 5 GB | 20 | Daily at your hour, 7 days | 5 |
| Scale | A$108.90 A$99 + GST | 2 | 2 GB | 10 GB | 10 GB | 60 | Hourly, 30 days | 20 |
CPU is a ceiling. Free pauses after 7 idle days. Only Scale makes masked clones. The console shows sizes in Gi and Mi.
Endpoints
| What | Address | Use for |
|---|---|---|
| Console | console.wattledb.com.au | Creating and managing databases, billing, team |
| Postgres, pooled | <id>.db.wattledb.com.au:<port> | DATABASE_URL, your app |
| Postgres, direct | <id>.db.wattledb.com.au:<port> | DIRECT_URL, migrations, psql, pg_dump |
| REST API | https://<id>.api.wattledb.com.au | PostgREST |
| File storage | https://storage.wattledb.com.au | S3, region au-syd-1, bucket tenant-<id> |
<id> is your database's id, such as t1a2b3c4d. The pooled and direct strings use the same host on different ports. Take both from the Connection panel.
FAQ
Where does my data live?
Databases run in Sydney (NEXTDC S1). Backups are kept cross-state in Melbourne (NEXTDC M2). Everything runs on Australian-owned infrastructure, and no one outside WattleDB and our Australian hosting and data-centre providers has access to your database or its backups.
Is it standard PostgreSQL?
Yes, PostgreSQL 17. Your ORM, migration tool, psql and dashboards connect as they would to any Postgres. See the extensions list for what you can install.
What happens when a Free database is idle?
After 7 days with no activity it pauses. Your data is kept. A paused database doesn't wake when an app connects, so the app will time out. Click Resume on its row on Databases to start it again.
How am I billed?
A paid database is invoiced when you create it, then monthly on that date, in advance. Each invoice is a GST tax invoice payable within 7 days by bank transfer or PayID. We hold no card or bank details and charge nothing automatically.
Can I cancel or delete at any time?
Yes, from the database's Settings tab. Cancel subscription keeps it running to the end of the month you've paid for. Delete permanently removes it straight away, with its backups and files, after you type its name. If you do either within 7 days of paying, we refund that month's payment (the one you've made, not earlier months you've used). Take a pg_dump first if you want to keep the data.